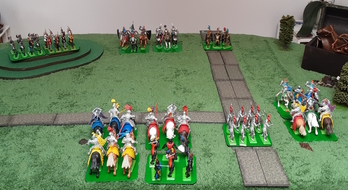
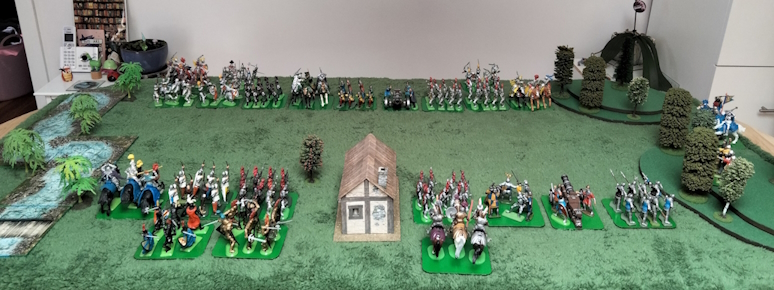
A couple of weeks ago, John came over for a long, overdue wargame. The game’s scenario was loosely based on the 1461 battle of Mortimer’s Cross during the War of the Roses. Our armies were made up of various 54mm Britains figures, with twelve units per side. John and I were commanding the Yorkist army, while the Lancastrian force was controlled by the dice-driven AI from “De Bellis Solitarius”. Further complexity was achieved by rolling a D20, with the result determining what random events might occur during each side’s turn. We used the medieval rules from Neil Thomas’s “One Hour Wargames”. All units had a break point of 15, while the army break point for both sides was only 3 units remaining.
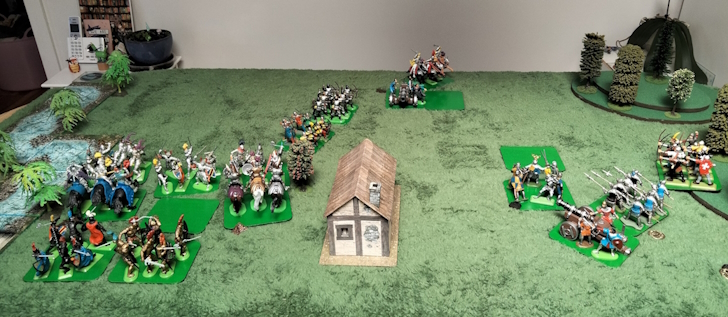
The Lancastrian army was deployed using the AI. John and I split the Yorkist command between us, with John commanding the right flank units and I commanding those on the left. We chose to deploy a unit of longbow men on a hill slightly forward of our right flank in the hope of enfilading the Lancastrians should they advance. We also detached a unit of knights to advance through the valley between the hills on our right with the intention of outflanking the Lancastrian line. The arrival of the flanking force was to be rolled for each turn, with the probability of it turning up increasing throughout the game.
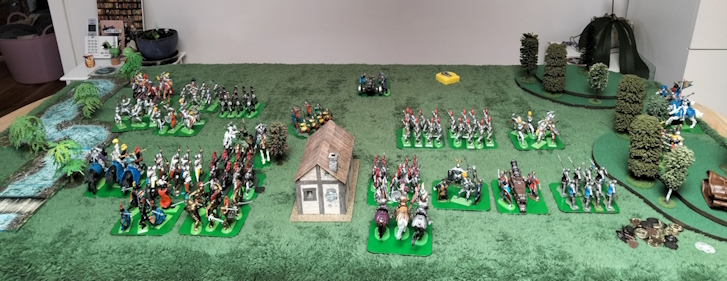
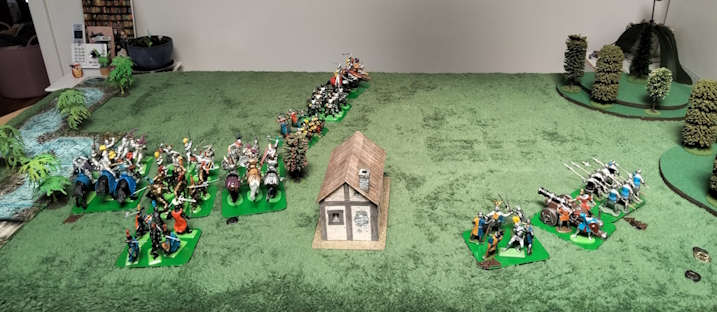
With turn one, John and I had the initiative but decided to remain on the defensive. Our bows were out of range of the Lancastrians, but we were able to hit them with a shot from our cannon, inflicting heavy casualties on a unit of knights on the Lancastrian left. This goaded the Lancastrians into action, and the Lancastrians became aggressive and made a general advance. The Lancastrian cannon fired in support but only dealt one casualty to a unit of levy on the Yorkist right flank.
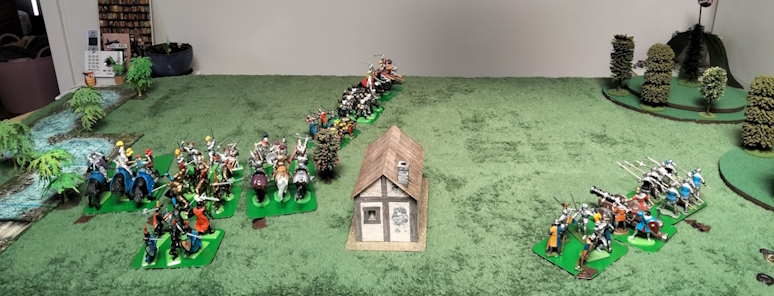
Turn two saw the destruction of the unit of knights on the Lancastrian left flank by the combined fire and missilery of the Yorkist cannon and the long bows on the hill. A charging unit of knights from the Lancastrian centre was heavily damaged by the bows on our left flank. In turn, the Lancastrian bows opposite our bowmen inflicted a couple of casualties on them. Confusion (a random event) broke out in the Lancastrian force, and three units were unable to move. The AI became more cautious, and the Lancastrian army assumed a more defensive posture and endeavoured to reform. However, the knights from the Lancastrian centre were fully committed and charged onwards, striking a unit of Yorkist levy on our left flank and causing more than a few casualties to them. Fire from the Lancastrian cannon caused a further loss to the Yorkist levy across the field from them.

Turn three and a random event roll allowed the Yorkist bows on the hill to loose two volleys into the Lancastrian men at arms (MAA) nearest to them, inflicting a great number of casualties. Our cannon also inflicted heavy damage on the Lancastrian levy opposite them. The Yorkist levy on our left flank continued to melee with the Lancastrian knights, causing further losses, while our bowmen loosed a volley into the opposing Lancastrian bowmen and caused some casualties. They, in turn, caused a couple of more Yorkist casualties. The Lancastrian cannon inflicted further light casualties on the Yorkist levy opposite them, while the attacking Lancastrian knights on our left flank caused great damage to the Yorkist levy from hand to hand. The Lancastrians also manoeuvred one unit of longbow men to a central position where they could shoot at our right flank.
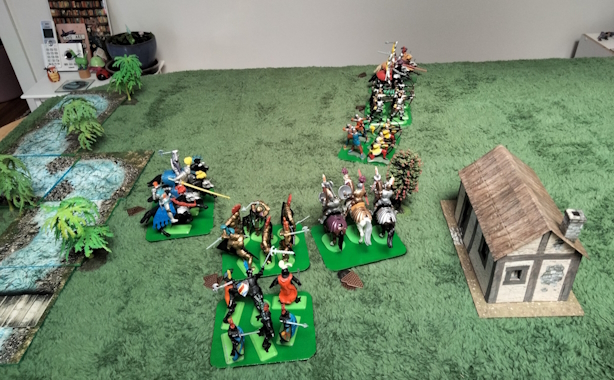
Turn four, and our flanking unit of Yorkist knights finally arrived at the field of battle. On the Yorkist right flank, a unit of levy and John’s personal retinue of men-at-arms advanced into contact with the Lancastrian levy, with John’s MAA doing considerable damage to the opposing levy. The Yorkist reserve knights were pulled from the right flank and positioned behind cover to avoid taking unnecessary casualties from the Lancastrian artillery. On our left, the Yorkist levy continued their melee with the Lancastrian knights, and our unit of bows inflicted light casualties on the advancing enemy MAA. In turn, the Lancastrians advanced their formidable right flank units, while their knights caused further damage to the Yorkist levy. The Lancastrians also moved a unit of MAA into contact with the levy on our extreme right and caused some casualties.
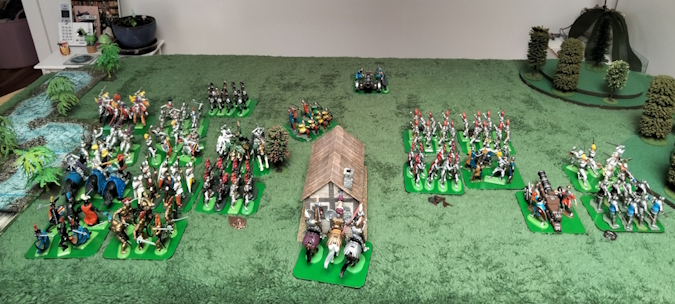
Turn five saw the right flank Yorkist levy, supporting John’s retinue, destroy their Lancastrian opponents. A brutal melee continued between John’s MAA and the second unit of Lancastrian levy. An equally desperate hand-to-hand fight continued between the levy on our far right and a unit of Lancastrian MAA. The unit of Yorkist knights on our left flank charged the Lancastrian MAA in front of them, causing some damage but also taking some in the Lancastrian turn. Our unit of longbow men on the left flank had little effect on the enemy MAA opposite them, while the levy still fought on against the Lancastrian knights. We also moved our reserve unit of knights to shore up our left flank as casualties mounted there. The Yorkist flanking force moved out of the valley and prepared to charge.
The Lancastrians rolled a random event that allowed their centre unit of longbows to loose two volleys, and this enabled them to eliminate one of our units of Yorkist levys. They also redeployed a unit of bows from their right flank to support their unit of bows in the centre, and so they formed a strong defensive line. Our left flank levy finally succumbed to the Lancastrian knights, leaving a gap in the line, while the MAA attacked our left flank bowmen.

Turn 6, and we were fortunate to get a double move on a random event roll. This allowed our flanking force to charge across the battlefield, hit the Lancastrian artillery on the flank, and almost wipe it out. The Yorkist bowmen and Levy on that flank were able to take out the unit of Lancastrian MAA. However, John’s retinue of MAA continued to battle the remaining Lancastrian Levy in hand-to-hand combat. On our left flank, the Yorkist reserve knights charged and eliminated the Lancastrian knights that had done for the Yorkist levy. Our other unit of knights and bowmen desperately fought on against the Lancastrian MAA. The Lancastrians, in response, redeployed their right flank unit of knights to strengthen their centre and attacked our reserve knights with a fresh unit of MAA. The Lancastrian artillery managed to fight back and inflict a little damage on our unit of knights.

Turn seven saw the destruction of the final unit of Lancastrian levy opposing us on our right flank. On our left flank, fierce hand-to-hand combat was taking place all along the line. In turn, the Lancastrian MAA finally wiped out our bowmen, and their reserve knights charged our unit of knights (in combat with the Lancastrian artillery) in the flank and slaughtered them.
Turn eight saw our Yorkist right flank form up into a new defensive line facing the Lancastrian centre. The Yorkist artillery managed to successfully eliminate the Lancastrian artillery with counter-battery fire. On our left flank, the destroyed unit of bowmen was replaced with MAA from our second-rank reserve. A desperate melee continued all along our left flank.
Turn nine, and our far-left unit of Yorkist knights finally destroyed the Lancastrian MAA that opposed them. Heavy combat still continued between the Yorkists and the remaining Lancastrian units on the left flank. The last unit of mounted Lancastrian knights returned to their central defensive line.
Turn ten saw our triumphant unit of knights wheel right, hit the nearest unit of Lancastrian MAA in the flank, and wipe them out. The Lancastrians then suffered misfortune due to a random event roll that meant their remaining unit of MAA took more casualties and were eliminated. With that, John and I, the Yorkists, were victorious, as the Lancastrians had reached their army break point while we still had eight units on the field. The sun, in all its splendour, had shone brightly on the sons of York that day.
John’s splendid narration of the game can be found here: