An expedition to Venus

Sir Arthur’s expedition setting off.

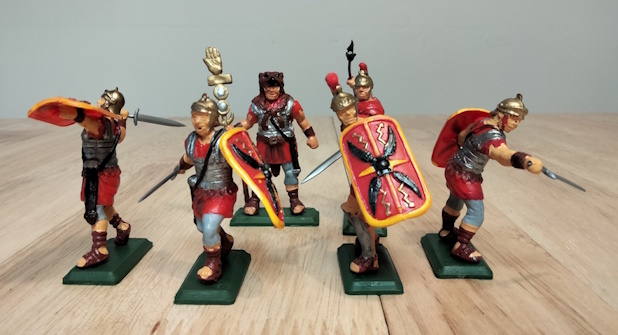
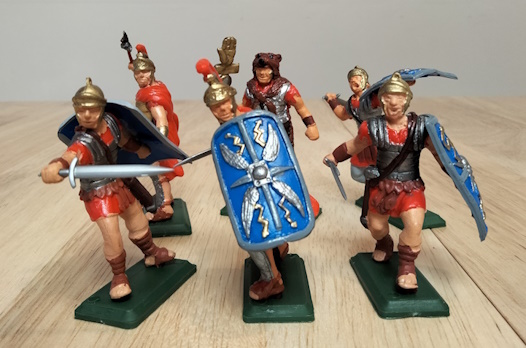
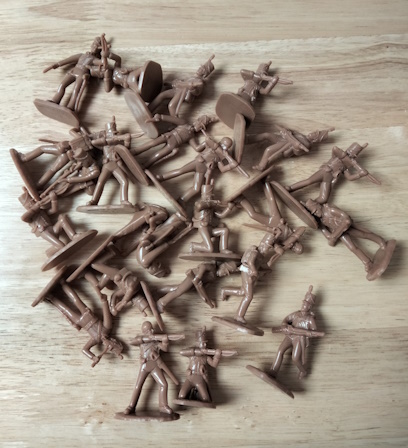
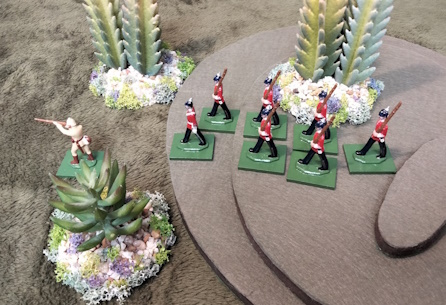
The World Illustrated News is pleased to report that the British Interplanetary Zoological Society’s expedition to Venus has been a triumph. The expedition sponsored by the society was led by renowned explorer and big game hunter Sir Arthur Runcible-Spoon, E.P.N.S. He was ably supported in his endeavours by a detachment of valiant men from the Tasmanian Rifle Regiment under Captain Richard Anglesey.

The aim of the expedition was to capture alive one or more of the reptilian denizens of Venus for scientific research. The creatures, called “dinosaurs,” inhabit the jungle that surrounds the newly established colonies and, while large, are significantly smaller than those of Earth’s geological past. Although it is said by explorers that greater beasts dwell in the vast depths of the Venusian jungle.

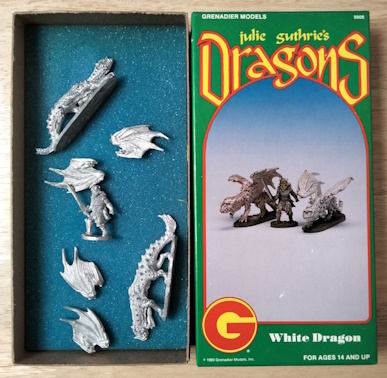
Sir Arthur has recently returned to London with the magnificent specimen of an “Armagasaurus” obtained by the expedition. The British Interplanetary Zoological Society has generously given permission for the animal to be placed on display. The great beast can now be viewed in the Geological Court at the Crystal Palace for the trifling sum of one shilling.

The terrible lizards.

The Game

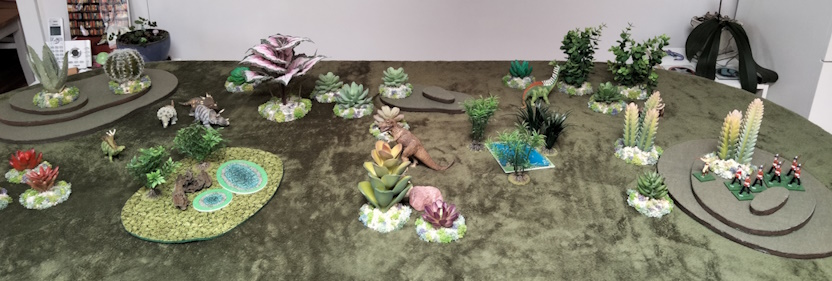
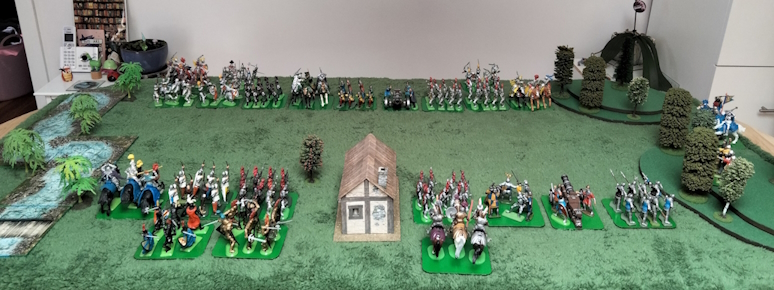
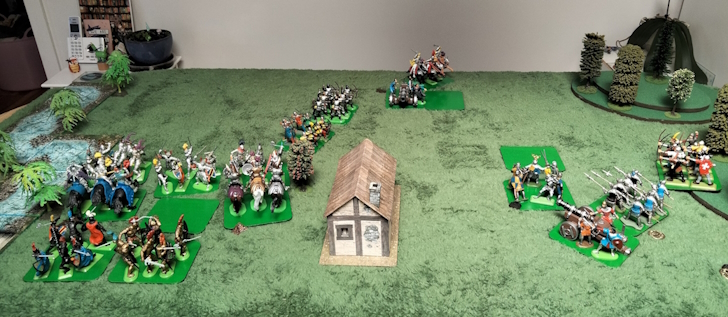
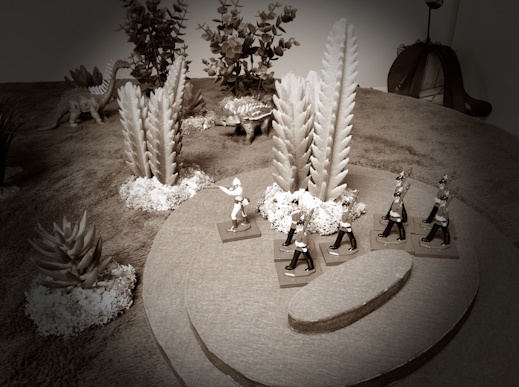
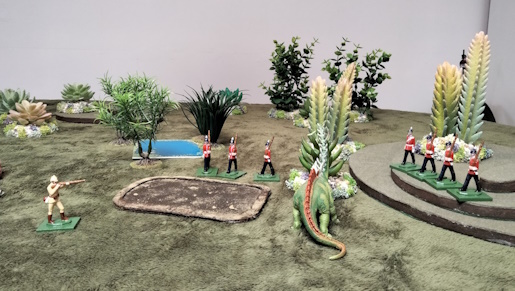
Turn 1. The expedition moves off into the forbidding Venusian jungle, consisting of Sir Arthur Runcible-Spoon E.P.N.S. and a detachment of the Tasmanian Rifle Regiment (T.R.R.) under Captain Richard Anglesey. Sir Arthur, in his eagerness, forged ahead.

From deep in the jungle, a lone Triceratops (trike) emerges, far from the expedition, and ambles towards the marsh.

Sir Arthur leads the way.

Turn 2. The men of the T.R.R. follow Sir Arthur. While a Tyrannosaurus rex also emerges from the jungle and begins to stalk the lone trike.

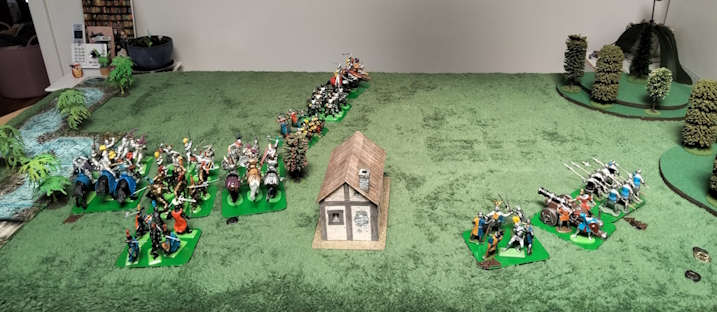
Turn 3. Sir Arthur, feeling the heat of the humid Venusian climate taking its toll, decides to stop for “tiffin,” and the expedition stops to take a rest.

The trike approaches the marsh. The T. rex decides not to follow and stays put. A second trike emerges from the jungle, but, hearing the unfamiliar noises coming from the adventurers, it moves away.

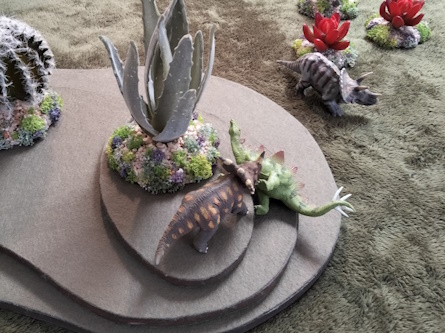
Turn 4. The expedition continues with their tea break. The first trike realises it is being stalked, turns around, and charges the T. rex. The second trike continues to move away from the expedition, while a Stegosaurus begins feasting on the plant life close to where the T. rex and first trike are situated. 

The trike charges the king.

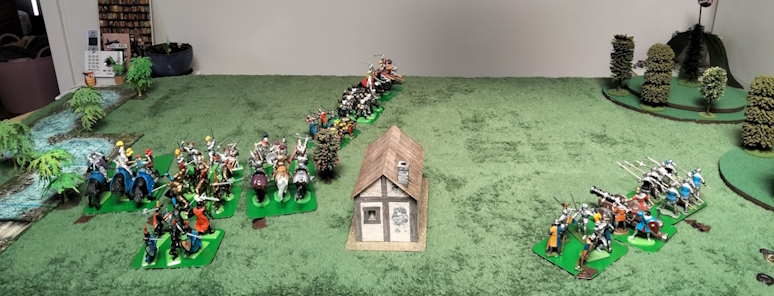
Turn 5. As “tiffin” continues, a very territorial Styracosaurus comes out of the jungle and aggressively attacks the peaceful Stegosaurus. The first trike attacks the T. rex. Trike two wanting to put more distance between it and the expedition keeps going.

Turn 6. With “tiffin” finally finished, Sir Arthur moves off into the jungle, leaving the men of the expedition to break camp.

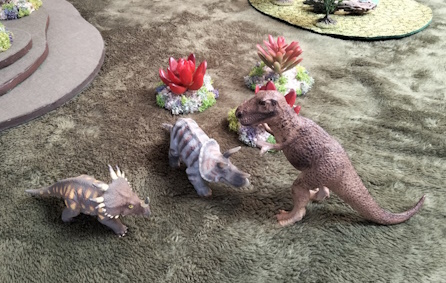
The charge of the first trike so surprises the T. rex that it runs away. The Styracosaurus and the Stegosaurus fight it out. Ultimately, the Styracosaurus (which takes 3 damage) wins, and the Stegosaurus is killed (having taken 7). The second trike moves further away.

Styracosaurus carnage.

Trike one follows up and charges the T. rex again. The Styracosaurus sees the T. rex, becomes enraged, and moves sharply towards it.

The horned beasts confront the tyrant king.

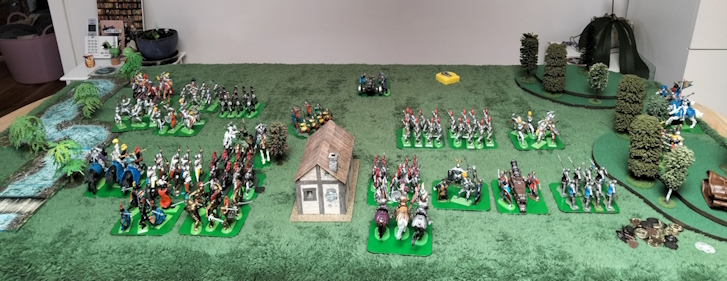
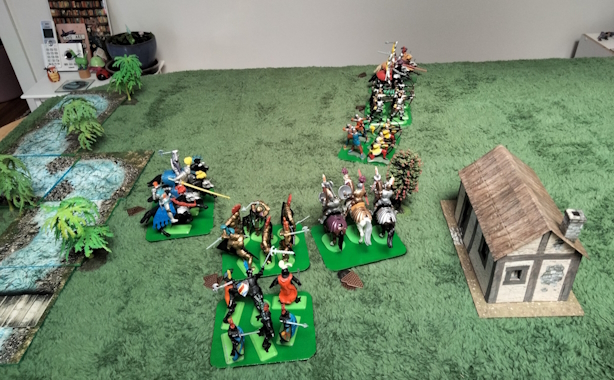
Turn 7. Sir Arthur ventures ever further away from the expedition and into the jungle in search of dinosaurs. Captain Anglesey splits his men and sends three to assist Sir Arthur while he follows up with the rest.

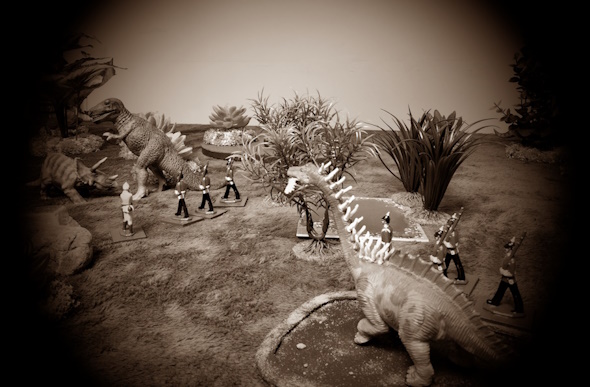
The T. rex once again flees before the aggressive trike. With the giant predator gone, the Styracosaurus and the Triceratops turn on each other, and a fight for supremacy takes place. An Amargasaurus ventures out of the surrounding jungle and begins to graze on the lush vegetation near the expedition’s location.

The Armagasaurus is sighted.

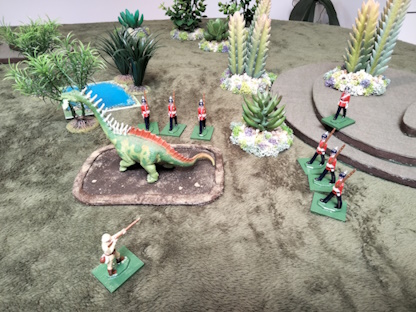
Turn 8. Sir Arthur and the men of the expedition see the Armagasaurus. The forward party immediately begins digging a pit trap to catch the dinosaur, while Sir Arthur turns back to assist in the capture of the beast. Captain Anglesey forms the remaining men into line in preparation to drive the animal towards the pit.

Turn 9. While the pit trap is being excavated, Sir Arthur moves to block the likely escape route of the Armagasaurus. The beast blissfully continues to graze, unaware of the preparations to capture it.

The clash between the first trike and the Styracosaurus ends in the death of the Styracosaurus (having taken 4 extra damage on top of that from the fight with the Stegosaurus). The trike, however, did not escape unscathed and limped away (after taking five hits).

The trap is set.

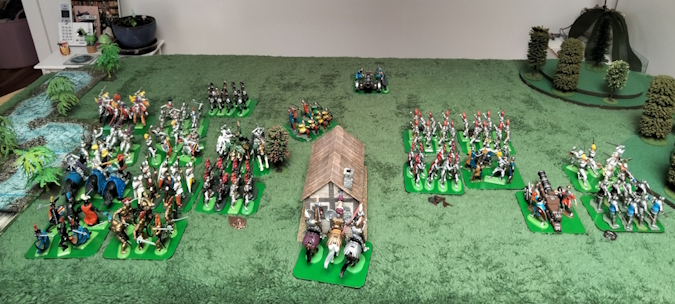
Turn 10. The pit trap is completed, and the beaters move forward, driving the Armagasaurus before them. The sauropod attempts to flee from the beaters, only to fall into the pit trap. Finally, the expedition had success.

The first trike, despite its wounds, charges the T. rex, which flees before it. The trike charges again, but this time the T. rex doesn’t give ground, and a fight ensues. The second trike encounters the fight and, seeing the T. rex, panics and flees back towards the expedition.

The beast is captured.

Turn 11. The expedition travels further into the forbidding Venusian jungle. Sir Arthur and the three men with him hear the bellows and roars of the fight and move towards the sounds. They come in sight of the titanic struggle between the T. rex and the Triceratops. The second trike flees further away from all apparent danger.

Turn 12. Hoping to bag the T. rex, Sir Arthur and the men with him fire at it but miss. The T. rex finally kills the Triceratops and roars in triumph. It then turns its attention to the men.

Battle of the beasts.

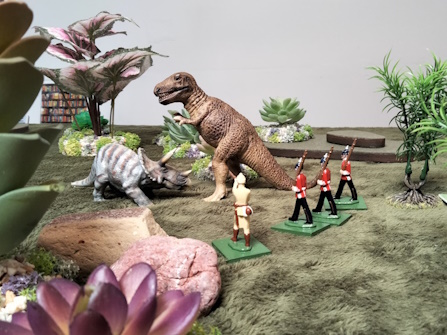
Turn 13. The rear section of the expedition under Captain Anglesey moved up to reinforce Sir Arthur’s group. The entire group forms a crescent around the T. rex and begins firing (inflicting 4 hits). The badly wounded T. rex panics and flees from the expedition.

Turns 14 and 15. The adventurers pursue the T. rex but are unable to catch it as it continues to flee deep into the jungle and out of sight.

The king flees.

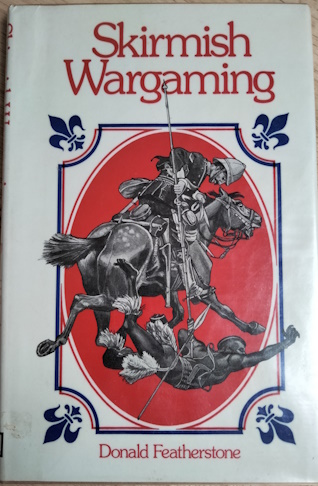
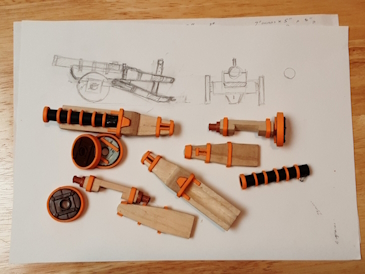
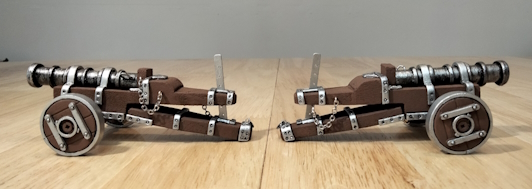
The game was played out over the recent long weekend using the “Sir Harry & the Dinosaurs” rules. The object is to catch as many dinosaurs as you can in a set time. For this game, I instead decided to play it for fifteen turns. The player controls the expedition, while a simple AI governs the behaviour and actions of the dinosaurs. Unfortunately, the rules only provide stats for four types of dinosaurs, namely Tyrannosaurus, Triceratops, Stegosaurus, and Brontosaurus. However, the stats can be readily applied to any similar creature, and, with some work, more specific stats could be figured out for a wide variety of prehistoric animals. The game proved to be great fun, and I enjoyed seeing how the interactions of the various dinosaurs played out with each other and ultimately with Sir Arthur’s expedition. I am sure he will eventually return to the humid jungle of Venus to make greater discoveries.

The jungle of Venus.

An odd collection of colonials, music, and military contractors.

The past summer saw a few more colonial purchases, comprising a vinyl record, a book, and some more 20mm metal miniatures. The record is titled “Soldiers of the Queen” and features music from the Boer War played by the Band of the Royal Military College Duntroon. It is in mint condition and cost me the princely sum of 50 cents in a local OP shop. Sadly, I haven’t been able to find any information about it.

Late-night trawls on eBay often turn up things of interest, and I was indeed fortunate to come across “Skirmish Wargaming” by Donald Featherstone for a reasonable price. It is a neat little hardcover book published by Patrick Stephens Ltd. in 1975. In it, Featherstone provides a general set of rules for skirmish gaming. These are then used in conjunction with some more specific rules to play various scenarios, from the Viking raids to World War Two. The scenarios are based around a set of characters and are quite narrative. Essentially, it is a book about skirmish gaming as story-telling.

Over the summer, I once again took advantage of the Newline Designs annual sale and bought another batch of ready-made “Men Who Would Be King” units in 20mm metal. All the figures this time were for the Zulu War. Three packs of British included two units of imperial regulars advancing and one pack of dismounted Frontier Light Horse. The Zulus were made up of one unit in ceremonial dress and two units without. I also received a small sample packet of British regular infantry firing.

Recently, another late-night trawl on eBay turned up a fascinating book on medieval military contractors by Geoffrey Trease, an author from my childhood. It is a weighty hard cover tome called “The Condottieri: Soldiers of Fortune,” published in 1970 by Thames and Hudson. The book is a very good general history of the lives and world of the great mercenary captains of the Middle Ages. Plenty of inspiration for further games.

Rome is your friend!

Another eBay purchase recently came in the mail after journeying all the way from Argentina in a surprisingly speedy fashion. This time, a couple of groups of 54mm Imperial Roman infantry arrived to extend the “friendship” of the Empire to all corners of the known world.

Some time ago, I decided I would like to have a small 54mm Roman army. I considered expanding my handful of old Timpo Romans into a usable force, but they are now prohibitively expensive to buy. Fortunately, DSG Britains produces Imperial Roman toy soldiers, including infantry, cavalry, and archers. They also make some “Carthaginians.” However, I am most likely to use the Romans against my Britains Deetail Saracens, as they could be a proxy for various eastern armies.

Serendipity, odds, and ends.

The past month or so has added more than a few things to my ever-growing collection of “stuff.” I’ve made some excellent finds on eBay and in the local op shop. Late-night trawls on eBay yielded things that I wasn’t actually looking for but was pleased to find and acquire.

First off, I found and bought twenty-four “Armies in Plastic” 1/32 Napoleonic Portuguese infantry for little outlay. They are meant to be cacadores but will, I think, serve equally well as British rifles, as they seem to be the same figures that AIP released for The Rifles, just in beige-coloured plastic rather than dark green. The other serendipitous find was an intact, boxed, set of white dragons from the “Julie Guthrie’s Dragons” range put out by Grenadier Models in 1990. I am very pleased to have acquired these, as I have greatly admired Julie Guthrie’s work for years.

While preparing for my Mortimer’s Cross game, I realised I was missing Book IV of WRG’s DBM ancient and medieval army lists, covering the period 1071 to 1500. So I set out to address that omission, and after some searching on eBay, I came across a near-pristine copy that was surprisingly inexpensive. The copy is the 2nd edition from 1999, so it may be a little dated, but it is still broadly useful. A bit later, I happened to be checking out the local op shops when I came across “A Great and Terrible King: Edward I and the Forging of Britain” by Marc Morris. As I have been taking a greater level of interest in medieval warfare recently, I bought it. It will probably take me a while to get around to reading it, but I will get to it eventually.

My lovely wife also bought me a few surprise gifts, the chief of which was a Ryobi 18V Compact Glue Gun. It is a very handy tool for all sorts of arts and crafts, particularly terrain construction. The others were a copy of the new novel by Bernard Cornwell, “Sharpe’s Command”, and J.R.R. Tolkien’s “The Battle of Maldon: Together with the Homecoming of Beorhtnoth”. There is plenty of inspirational reading there for the summer.

Mostly Mortimer’s Cross

A couple of weeks ago, John came over for a long, overdue wargame. The game’s scenario was loosely based on the 1461 battle of Mortimer’s Cross during the War of the Roses. Our armies were made up of various 54mm Britains figures, with twelve units per side. John and I were commanding the Yorkist army, while the Lancastrian force was controlled by the dice-driven AI from “De Bellis Solitarius”. Further complexity was achieved by rolling a D20, with the result determining what random events might occur during each side’s turn. We used the medieval rules from Neil Thomas’s “One Hour Wargames”. All units had a break point of 15, while the army break point for both sides was only 3 units remaining.

The Lancastrian army was deployed using the AI. John and I split the Yorkist command between us, with John commanding the right flank units and I commanding those on the left. We chose to deploy a unit of longbow men on a hill slightly forward of our right flank in the hope of enfilading the Lancastrians should they advance. We also detached a unit of knights to advance through the valley between the hills on our right with the intention of outflanking the Lancastrian line. The arrival of the flanking force was to be rolled for each turn, with the probability of it turning up increasing throughout the game.

With turn one, John and I had the initiative but decided to remain on the defensive. Our bows were out of range of the Lancastrians, but we were able to hit them with a shot from our cannon, inflicting heavy casualties on a unit of knights on the Lancastrian left. This goaded the Lancastrians into action, and the Lancastrians became aggressive and made a general advance. The Lancastrian cannon fired in support but only dealt one casualty to a unit of levy on the Yorkist right flank.

Turn two saw the destruction of the unit of knights on the Lancastrian left flank by the combined fire and missilery of the Yorkist cannon and the long bows on the hill. A charging unit of knights from the Lancastrian centre was heavily damaged by the bows on our left flank. In turn, the Lancastrian bows opposite our bowmen inflicted a couple of casualties on them. Confusion (a random event) broke out in the Lancastrian force, and three units were unable to move. The AI became more cautious, and the Lancastrian army assumed a more defensive posture and endeavoured to reform. However, the knights from the Lancastrian centre were fully committed and charged onwards, striking a unit of Yorkist levy on our left flank and causing more than a few casualties to them. Fire from the Lancastrian cannon caused a further loss to the Yorkist levy across the field from them.

Turn three and a random event roll allowed the Yorkist bows on the hill to loose two volleys into the Lancastrian men at arms (MAA) nearest to them, inflicting a great number of casualties. Our cannon also inflicted heavy damage on the Lancastrian levy opposite them. The Yorkist levy on our left flank continued to melee with the Lancastrian knights, causing further losses, while our bowmen loosed a volley into the opposing Lancastrian bowmen and caused some casualties. They, in turn, caused a couple of more Yorkist casualties. The Lancastrian cannon inflicted further light casualties on the Yorkist levy opposite them, while the attacking Lancastrian knights on our left flank caused great damage to the Yorkist levy from hand to hand. The Lancastrians also manoeuvred one unit of longbow men to a central position where they could shoot at our right flank.

Turn four, and our flanking unit of Yorkist knights finally arrived at the field of battle. On the Yorkist right flank, a unit of levy and John’s personal retinue of men-at-arms advanced into contact with the Lancastrian levy, with John’s MAA doing considerable damage to the opposing levy. The Yorkist reserve knights were pulled from the right flank and positioned behind cover to avoid taking unnecessary casualties from the Lancastrian artillery. On our left, the Yorkist levy continued their melee with the Lancastrian knights, and our unit of bows inflicted light casualties on the advancing enemy MAA. In turn, the Lancastrians advanced their formidable right flank units, while their knights caused further damage to the Yorkist levy. The Lancastrians also moved a unit of MAA into contact with the levy on our extreme right and caused some casualties.

Turn five saw the right flank Yorkist levy, supporting John’s retinue, destroy their Lancastrian opponents. A brutal melee continued between John’s MAA and the second unit of Lancastrian levy. An equally desperate hand-to-hand fight continued between the levy on our far right and a unit of Lancastrian MAA. The unit of Yorkist knights on our left flank charged the Lancastrian MAA in front of them, causing some damage but also taking some in the Lancastrian turn. Our unit of longbow men on the left flank had little effect on the enemy MAA opposite them, while the levy still fought on against the Lancastrian knights. We also moved our reserve unit of knights to shore up our left flank as casualties mounted there. The Yorkist flanking force moved out of the valley and prepared to charge.

The Lancastrians rolled a random event that allowed their centre unit of longbows to loose two volleys, and this enabled them to eliminate one of our units of Yorkist levys. They also redeployed a unit of bows from their right flank to support their unit of bows in the centre, and so they formed a strong defensive line. Our left flank levy finally succumbed to the Lancastrian knights, leaving a gap in the line, while the MAA attacked our left flank bowmen.

Turn 6, and we were fortunate to get a double move on a random event roll. This allowed our flanking force to charge across the battlefield, hit the Lancastrian artillery on the flank, and almost wipe it out. The Yorkist bowmen and Levy on that flank were able to take out the unit of Lancastrian MAA. However, John’s retinue of MAA continued to battle the remaining Lancastrian Levy in hand-to-hand combat. On our left flank, the Yorkist reserve knights charged and eliminated the Lancastrian knights that had done for the Yorkist levy. Our other unit of knights and bowmen desperately fought on against the Lancastrian MAA. The Lancastrians, in response, redeployed their right flank unit of knights to strengthen their centre and attacked our reserve knights with a fresh unit of MAA. The Lancastrian artillery managed to fight back and inflict a little damage on our unit of knights.

Turn seven saw the destruction of the final unit of Lancastrian levy opposing us on our right flank. On our left flank, fierce hand-to-hand combat was taking place all along the line. In turn, the Lancastrian MAA finally wiped out our bowmen, and their reserve knights charged our unit of knights (in combat with the Lancastrian artillery) in the flank and slaughtered them.

Turn eight saw our Yorkist right flank form up into a new defensive line facing the Lancastrian centre. The Yorkist artillery managed to successfully eliminate the Lancastrian artillery with counter-battery fire. On our left flank, the destroyed unit of bowmen was replaced with MAA from our second-rank reserve. A desperate melee continued all along our left flank.

Turn nine, and our far-left unit of Yorkist knights finally destroyed the Lancastrian MAA that opposed them. Heavy combat still continued between the Yorkists and the remaining Lancastrian units on the left flank. The last unit of mounted Lancastrian knights returned to their central defensive line.

Turn ten saw our triumphant unit of knights wheel right, hit the nearest unit of Lancastrian MAA in the flank, and wipe them out. The Lancastrians then suffered misfortune due to a random event roll that meant their remaining unit of MAA took more casualties and were eliminated. With that, John and I, the Yorkists, were victorious, as the Lancastrians had reached their army break point while we still had eight units on the field. The sun, in all its splendour, had shone brightly on the sons of York that day.

John’s splendid narration of the game can be found here:

Knightly oddments.

Over the last month, a few odds and ends have arrived in the mail. The parcels contained some interesting (at least for me) new goodies. A couple of small packages with knights to add to my stash. The first to arrive contained three metal 1/32 Lone Star “Knights of the Round Table” from around 1981. I believe there were six in the set, but I ended up with Lancelot, Galahad, and Bedivere. I will have to keep an eye out for Arthur, Percival, and Gareth.

The second small package contained a few old silver-painted black plastic Hong Kong recasts of a Britains Deetail knight and four Turks. Interestingly, one of the Turks isn’t a straight recast, as it was heavily modified. The original Britains figure holds a polearm in two hands, whereas the Hong Kong recast holds a shield and a single-handed weapon in the right.

The last parcel was rather large and contained a painting table that my lovely wife had purchased as an early birthday present. It is a very useful table as it folds down and is on castors, so it can easily be put away when not in use. I now have a semi-permanent work table and don’t have to put things away as I did every time the kitchen table was required.

Things that go boom!

After my last game using the Britains knights, I decided that I needed some field artillery as it was an increasingly important feature of late medieval warfare. I had a look around to see what was available in 1/32 or similar but didn’t find anything that met my requirements or my pocket. Consequently, I decided to build my own.

So, I consulted my books and decided I wanted to build a breech-loader. Then I searched the internet for more information and pictures of medieval artillery, particularly period illustrations. After a good rummage, I found a few bits and bobs that I could use and made a rough-to-scale sketch of the gun I was to build. In the end, I built two guns as it was just as easy as building one and I had sufficient parts.

The gun carriages, trails and axles were cut and shaped from paulownia wood, an alternative to balsa. The trails were then attached to the carriages with small brass hinges to allow the guns to be elevated or depressed if I wanted. I then applied EVA ironwork to the carriages, adding rivets by pushing an empty clutch pencil into the foam. Holes were also drilled into the carriages to accommodate metal eyes made from wire so chains could be added later.

The gun barrels are simply plastic cylinders from the centre of dog waste bags with the ribbing cut from EVA foam and glued on. As many early medieval breech-loading cannons had replaceable powder chambers, I attached handles made from pieces of paper clip to the chamber sections and drilled touch holes.

The wheels came from a plastic toy battering ram base that I bought from an Op shop quite some years ago. As the wheels were hollow, I filled them with two part epoxy putty to make them solid. EVA foam tyres and reinforcing straps were added. The wheels were then attached to the axles with screws and EVA foam reinforcing straps were glued on to the axles where appropriate and then “riveted”.

I coated all the EVA foam parts with an acrylic sealer to stiffen them up ready for painting and then painted the cannon barrels and the area where they would be attached to the carriages. After that, wooden wedge “breech blocks” and the gun barrels were glued onto the carriages and more EVA straps were added. Next, the axles and wheels were attached and the almost completed cannons were painted in a simple toy soldier style.

Sections of an old watch chain were added to connect the “breech blocks” to the carriages and to attach metal pins to hold the guns at their desired elevation. Finally, I cut some strips of plastic card and drilled holes in them to make the “racks” for the pins, painted them, and glued them into slots on the trails.

I am really quite happy with how they turned out. They certainly look the part. These infernal engines will give my old Britains / Herald siege engine crew something to make go boom when my knights take the field again.

Book bonanza

Over the past few weeks, I have acquired some more secondhand military and general history books to add to my collection, as apparently I didn’t have enough to read already. All were chance finds and only cost me a couple of dollars each, so it was something of a bonanza.

“Ceremonial Uniforms of the World” by Jack Cassin-Scott and John Fabb was published in 1973 and is packed with colour plates and information. The illustrated uniforms date from the middle of the eighteenth century through 1973 and cover a very broad range of ceremonial and guard units from around the world.

“Heraldry of the World” by the splendidly named Carl Alexander von Volborth was also published in 1973 as part of the Blandford Colour Series range of books. It is packed full of black & white and colour illustrations and supported by “potted” information regarding heraldry. Some of the information is a little dated as the world has changed in the 50 years since publication, but it is still a useful little reference book and will fit in nicely with my uniform books from the same series.

“Uniforms of the World” by Richard Knotel, Herbert Knotel, and Herbert Sieg was a fantastic find. It is a weighty tome packed full of authoritative information and supporting line drawings of uniforms from around the world in the period between 1700 and 1937. Once again, some of the information may be dated, but it remains an excellent reference book.

The last two books are The Folio Society’s “A History of England”, printings of “Early Medieval England” by M. T. Clanchy, and “England in the Later Middle Ages” by M. H. Keen. The books are 5th editions, published in 2000, but are sadly missing their cases. “Early Medieval England” covers the period from 1066 to 1272, and “England in the Later Middle Ages” covers 1290 to 1485.

A spot of painting.

My start to painting this year has thus far proven somewhat abortive. However, despite other distractions, I managed to do a spot of painting and finish a couple of Reaper Bones fantasy figures. Both figures were painted using contrast paints over grisaille under-painting. I started the skeleton knight last year but put it away along with my paints when house renovations began, but it is now finally completed and only awaits varnish and a base.

The zombie wolf I started earlier this year, and I usually begin painting stints by starting something new as it helps me get into the right mindset, basically “priming the pump”. I used plenty of timber wolf reference material, as I wanted the zombie wolf to look right even if it was undead. It, too, only awaits varnish and a simple black disc base.

The Battle of Riddle Hill

The Lancastrian army slowly advanced northward until they came to a junction on the well-travelled road to the rich market town of Riddlington. The side road was no less important to their army as it led west to Lower Sackville. There, further supplies could be had for their campaign. To the north-west, the junction was dominated by Riddle Hill. As the Lancastrians paused their advance, the morning mist dispersed to reveal the Yorkist army in all its power, armour gleaming and standards fluttering in the morning air.

The first turn, the arrival of the Lancastrians sooner than expected, caused confusion in the Yorkist ranks, and several units were unable to move. Equally, the sight of the fully arrayed Yorkists led to panic among the Lancastrian blue knights, and they received 5 damage as many knights fled (the total break point for all units being 15).

With the second turn, the Yorkist army had the initiative, and the left flank knights became impetuous and charged across the field and crashed into the Lancastrian knights on the right flank, causing 5 damage to them. The initiative switched to the Lancastrians, and the army launched an aggressive attack. The Lancastrian levy charged quickly along the road towards the Yorkist men at arms (MAA). The knights on the Lancastrian right inflicted one hit on the Yorkist knights that had charged them. The units of Lancastrian blue and red knights in the centre spurred forwards towards the Yorkist line. The reserve unit of yellow knights followed suit, and the MAA moved towards the Yorkist bows on Riddle Hill.

Turn three, the Yorkist bows unleashed a storm of arrows upon the charging Lancastrian yellow knights and caused 11 casualties, while the centre units of Yorkist gold and silver knights counter charged the Lancastrian centre. The resulting melee inflicted a further 6 hits on the Lancastrian blue knights (total 11) and 6 hits on the red knights.

The charge of the Lancastrian yellow knights was not slowed by the arrow storm and they rode up the hill to strike the Yorkist bowmen and caused 1 damage to them. The Lancastrian MAA continued their advance against the other unit of archers, while the levy kept up their own attack. Meanwhile, in the centre, the Lancastrian knights imposed 8 casualties on the Yorkist gold knights and 4 on the silver knights.

Turn four, the Yorkist bows managed to eliminate the Lancastrian yellow knights. The gold Yorkist knights destroyed the blue Lancastrian knights, while the silver Yorkist knights inflicted a further 8 hits (total 14) on the Lancastrian red knights. The Yorkist MAA attacked the Lancastrian levy and did 1 damage to them. The left flank Yorkist knights finally eliminated the Lancastrian right flank knights.

The desperate Lancastrians became defensive. The red knights rallied, and they regained 3 hit points. The Lancastrian MAA kept up their advance and attempted to flank the archers on the hill, while the reinvigorated red knights imposed 4 hits on the Yorkist silver knights and the levy did 2 damage to the Yorkist MAA.

During turn five, the gold Yorkist knights started to wheel around in order to charge the Lancastrian red knights. The silver Yorkist knights, however, destroyed the Lancastrian knights. The right-hand unit of bows inflicted 2 hits on the Lancastrian MAA, while the Yorkist MAA caused 4 hits to the Lancastrian levy. In turn, the Lancastrian MAA climbed the hill and attacked the far right Yorkist archers, doing them 6 damage. The Lancastrian levy caused four casualties to the Yorkist MAA.

Turn six, and with victory in sight, confusion broke out in the Yorkist army, and only half the units were capable of moving. The Yorkist archers turned to face the Lancastrian MAA and did 1 damage to them. The Yorkist MAA inflicted a further four hits on the Lancastrian levy. The Yorkist gold knights wheeled to the right and moved towards the Lancastrian MAA. The silver Yorkist knights also began to wheel and manoeuvre to attack the Lancastrian levy. In turn, the Lancastrian MAA did a further 3 damage (9 total) on the right hand bows and the levy caused 3 casualties to the Yorkist MAA (total 9).

At turn seven, the Yorkist bows inflicted 2 more hits on the Lancastrian MAA, and the Yorkist MAA did a further 4 damage to the Lancastrian levy. The gold and silver knights continued their respective advances towards the remaining Lancastrian units. Under pressure from the Lancastrian MAA, panic started amongst the Yorkist bows, and men began to flee, causing 5 damage to the rear unit. The Lancastrian MAA imposed 1 more hit point on the Yorkist archers, while the levy caused 1 casualty to the Yorkist MAA (10 total).

At turn eight and sensing victory, the Yorkists fully took the initiative, and the silver Yorkist knights charged the Lancastrian levy in the rear and destroyed them. The gold Yorkist knights hit the Lancastrian MAA in the flank and eliminated them. The Lancastrian army was utterly destroyed, and the Yorkist army was victorious and met the victory conditions by controlling both the hill and road junction.

I fought this fictional battle on a whim over the Easter break (it has taken me a while to type it up), as I had been thinking about using my old Britains Deetail and modern DSG Britains mediaeval figures for a game for some time. I used the mediaeval “One Hour Wargames” rules by Neil Thomas, as Britains knights fit neatly into the defined categories and they provide a fast, enjoyable game. Despite that, the game took me a good couple of hours to play out to a conclusion. I used the army generator and the “pitched battle” scenario from the rules, along with suggested events. While the rules indicate event cards be drawn every turn, I simply rolled a D20 to determine the result and consulted the list of events. This, along with dice-driven AI, gives a solo game more depth and unpredictability. I used “De Bellis Solitarius” by Chad La Mons to drive the Lancastrian army for this game.